
How to Harvest Pepper Seeds to Grow Next Year
Share
As the pepper season winds down, your plants are likely still loaded with vibrant, colorful pods. While you're busy enjoying your fresh harvest, it's the perfect time to think about next year's garden. Saving your own pepper seeds is a simple, rewarding process that not only saves you money but also allows you to preserve your favorite pepper varieties for seasons to come.
This guide will walk you through everything you need to know, from picking the right peppers to storing your seeds for maximum viability.
Why Save Pepper Seeds?
Beyond the simple satisfaction of self-sufficiency, saving seeds connects you to a tradition that's as old as farming itself. It allows you to select seeds from your strongest, most productive plants, potentially adapting a variety to your specific garden conditions over time. Plus, you'll have more than enough seeds to share with fellow gardening enthusiasts!
Step 1: Choose the Right Peppers for Seed Saving
The first step is selecting the best possible peppers. You're not just looking for a good-looking pod; you're looking for genetic excellence.
- Let Them Fully Ripen: For the best results, you must let the pepper fully ripen on the plant. This means letting it go past the stage you’d normally pick it for eating. A jalapeño should be deep red, not green. A Golden Cayenne should be a brilliant gold. The pepper should be at its final color and may even have started to wrinkle slightly. This ensures the seeds inside are mature and viable.
- Pick the Best Plants: Harvest seeds from your healthiest and most vigorous plants. Avoid any plants that have shown signs of disease or stress. The goal is to pass on the best traits to the next generation.
Step 2: Safety First! (Especially with Super-Hots)
If you're harvesting seeds from hot peppers, this step is non-negotiable. The oils (capsaicin) that make peppers like the Carolina Reaper or Ghost Pepper so intensely hot can cause serious skin and eye irritation.
Always wear gloves. For super-hots, you may even want to consider safety glasses and work in a well-ventilated area.
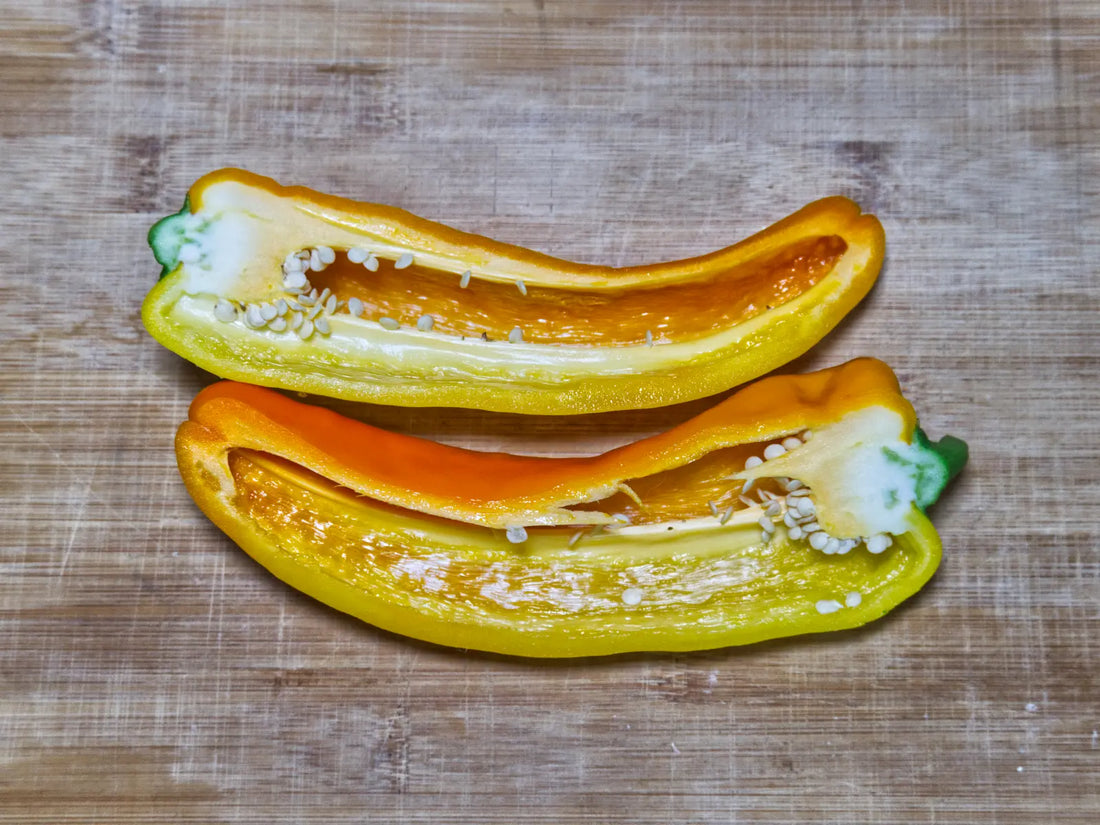
Step 3: Extract the Seeds
- Cut the Pepper Open: Using a sharp knife, carefully slice the pepper open lengthwise.
- Scrape the Seeds: The seeds are attached to the white, pithy core (the placenta). Use a small spoon or the dull side of your knife to gently scrape the seeds onto a paper plate, coffee filter, or paper towel. Try to separate them from any bits of pepper flesh.
Step 4: Dry Your Pepper Seeds
Properly drying your seeds is the most critical step for long-term storage.
- Spread Them Out: Arrange the seeds in a single layer on your paper plate or towel. Make sure they aren’t clumped together, as this can trap moisture and lead to mold.
- Find a Good Location: Place the seeds in a cool, dry, and well-ventilated area that is out of direct sunlight. A countertop in a non-humid room or a shelf in a pantry works great.
- Be Patient: Let the seeds air-dry for at least one to two weeks. You'll know they are fully dry when they are hard and brittle. A good test is to try and bend one; if it snaps, it's ready. If it bends, give it more time.
Step 5: Store Your Seeds for Next Season
Once your seeds are bone-dry, it's time to store them.
- Packaging: Small paper envelopes, coin envelopes, or small zip-top bags work perfectly. Paper is often preferred as it allows for a tiny bit of air exchange.
- Label Everything: This is crucial! Label your container with the pepper variety (e.g., "Aji Charapita") and the date you harvested them. You'll thank yourself next spring.
- Cool, Dark, and Dry: Store your labeled seeds in a cool, dark, and dry place. A drawer, a closet, or a sealed container in the refrigerator are all excellent options.
A Note on Cross-Pollination
If you grow several different types of peppers close to each other, like a sweet Shishito next to a spicy Thai Dragon, be aware that they can cross-pollinate. This means the seeds you save might produce a surprise hybrid next year! While this can be a fun experiment, if you want to guarantee a pure variety, it's best to either isolate the plants or purchase guaranteed seeds.
Get Ready for Next Year's Garden!
Now that you've mastered the art of saving seeds, you're well on your way to another amazing pepper garden. To make sure you have everything you need to know for a successful season, from germination to hardening off and dealing with pests, be sure to check out our comprehensive pillar post: The Ultimate Guide to Growing Peppers: From Seed to Harvest.
And don't forget to explore our collection of unique and popular pepper seeds to add some new and exciting varieties to your garden next year!