
The Ultimate Guide to Growing Peppers: From Seed to Harvest
Welcome, fellow heat-seekers and flavor fanatics! Here at Scorch Squad, we believe that one of the most rewarding experiences is biting into a pepper you grew yourself - feeling that perfect crunch, tasting the unique flavor, and, of course, embracing that glorious heat. But getting from a tiny seed to a bountiful harvest can feel intimidating.
Fear not! We're here to guide you on your spicy journey. This is your ultimate, no-nonsense guide to growing incredible peppers, whether you're aiming for a mild sizzle or a full-on inferno.
Let's get growing!
Choosing Your Pepper Varieties
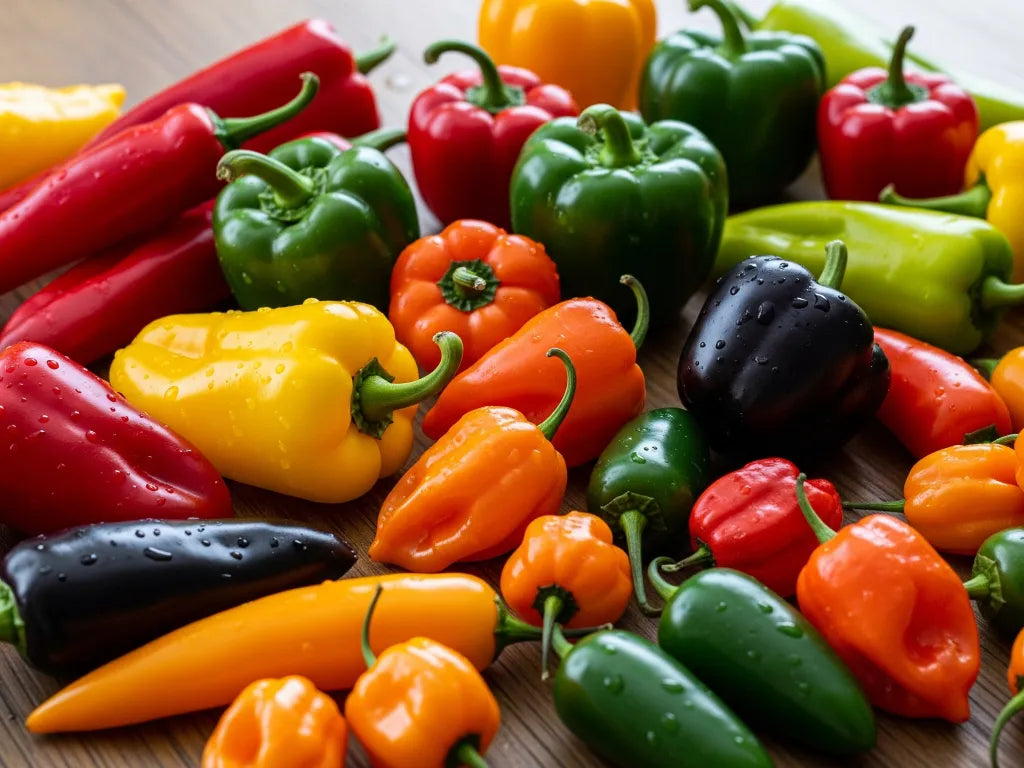
The first step is always the most exciting: deciding what to grow! The world of peppers is vast and vibrant. Thinking about a few key factors will help you narrow down the options and choose the varieties that are perfect for your garden and your palate. If you're just starting out, check out our list of the Top 10 Easiest Hot Peppers for Beginner Gardeners.
Heat Level (Scoville Heat Units - SHU)
This is the first thing most people think of. Are you a fan of a gentle warmth or do you chase the fire of a superhot? To fully understand how heat is measured, dive into our guide: The Scoville Scale Explained: From Bell Pepper to Carolina Reaper.
- Mild (0 - 5,000 SHU): Think Bell Peppers, Banana Peppers, and Shishitos. These are all about flavor without the burn. They're perfect for stuffing, fresh salads, and blistered appetizers.
- Medium (5,000 - 30,000 SHU): This is the sweet spot for everyday use. Jalapeños and Serranos live here, offering a noticeable kick that enhances but doesn't overwhelm. They are the perfect all-rounders for salsa, poppers, and adding a solid kick to any dish. Looking for inspiration? Explore our list of 7 Mild-to-Medium Peppers Packed with Taste.
- Hot (30,000 - 100,000 SHU): Now we're building real heat. Varieties like Cayenne and Tabasco deliver a sharp, clean burn. These are excellent for drying into fiery flakes or creating your own classic hot sauce. Meet the titans of heat in our Scorch Squad Spotlight: 5 Superhot Peppers for the Ultimate Chilihead.
- Superhot (100,000+ SHU): Welcome to the inferno. Habaneros, Ghost Peppers, and Carolina Reapers are for the true thrill-seekers. The heat is intense and can be long-lasting, but behind it, you'll find incredibly complex, fruity, and floral flavors you won't find anywhere else.
Scorch Squad Tip: Always wear gloves when handling and cutting superhot peppers!
Flavor Profile
Heat is only half the story. Every pepper has a unique taste. Some, like the Habanero, have distinct tropical fruit and floral notes. Others, like the Poblano, are rich and smoky. You'll find peppers with citrusy flavors (Lemon Drop), earthy tones (Pasilla Bajio), or even sweet, berry-like notes. Read the seed descriptions to find a flavor that excites your taste buds. Learn more in our guide: Capsicum Annuum vs. Capsicum Chinense: What's the Difference for a Gardener?
Your Growing Season
Peppers love heat and sun. Some varieties, especially superhots, have a very long growing season (120+ days from transplanting). If you live in a cooler climate with a shorter summer, you'll need to give them a solid head start indoors to ensure they have enough time to ripen fully. Varieties like Jalapeños and Cayennes tend to mature faster. Live in a cooler climate? Discover the Best Pepper Varieties for Short Growing Seasons.
Plant Size & Use
How much space do you have? Some pepper plants stay compact and are perfect for containers on a sunny patio (like Thai Dragon). Others, like many of the Capsicum annuum varieties, can grow into large, bushy plants that need more space in a garden bed. Think about whether you want a compact ornamental plant or a sprawling pepper factory. No garden bed? No problem! See The Best Peppers for Container Gardening: Big Yields in Small Spaces.
Your Culinary Goals
What do you want to do with your peppers?
- Making hot sauce requires different peppers than making spice powders. Read The Ultimate Guide to Making Hot Sauce: Which Peppers Should You Grow?
- If you dream of your own chili flakes, you'll want specific thin-walled varieties. Find The Perfect Peppers for Drying and Making Your Own Spice Powders.
Ready to try something new? Go Beyond the Jalapeño with these 7 Unique Pepper Varieties to Wow Your Friends.
Fire up your garden plan by checking out the Scorch Squad Seed Collection!
Starting Seeds Indoors
 To get the best possible harvest, especially in climates with shorter summers, you need to start your pepper seeds indoors. Peppers are tropical plants that crave a long, hot season. Starting them inside gives them the crucial head start they need to mature and produce an absolute mountain of pods before the first frost hits. Follow along with our 4-Week Pepper Growth Timeline to see what to expect.
When to Start
Aim for 6-8 weeks before your last average frost date. A quick online search for "last frost date [your city]" will give you your target. For notoriously slow-growing superhots like Ghost Peppers or Reapers, you might even want to start them 10-12 weeks beforehand. Not sure about your timing? Read our guide on When to Start Pepper Seeds Indoors: A Zone-by-Zone Guide.
Your Seed-Starting Toolkit:
Before you plant, make sure you have the right gear. Check out Your Essential Pepper Seed Starting Shopping List to get fully prepared.
- Scorch Squad Pepper Seeds: The most important ingredient!
- Seed Starting Mix: Use a light, fluffy, and sterile mix. Don't use heavy garden soil, which can compact easily and harbor fungal diseases that kill seedlings (a condition called "damping off"). Unsure what to use? Compare options in our guide: DIY vs. Store-Bought: What's the Best Seed Starting Mix for Peppers?
- Seed Trays or Small Pots: Anything with good drainage holes will work.
-
Heat Mat (Game-Changer!): Peppers germinate best in warm soil, ideally between 80-85°F (27-29°C). A heat mat placed under your seed tray is the single best tool to speed up germination and increase your success rate. Learn why this is our #1 tip in Do You Really Need a Heat Mat for Pepper Seeds? (Spoiler: Yes!)
- Grow Light: A sunny windowsill is often not enough. A simple LED shop light or a dedicated grow light is essential to prevent your seedlings from becoming weak and "leggy" (stretching desperately for light). Read The Ultimate Guide to Grow Lights for Pepper Seedlings to find the perfect one for your space.
- Labels: Trust us, after a few weeks, you won't remember which is which. Label everything!
Step-by-Step Germination:
- Moisten Your Mix: Before filling your trays, put your seed starting mix in a bucket or bowl and add warm water. Mix it until it's evenly damp, like a wrung-out sponge. This ensures the seeds have moisture all around them from the start.
- Fill Your Trays: Fill your containers with the pre-moistened mix. Don't pack it down too tightly.
-
Plant the Seeds: Plant 1-2 seeds per cell about ¼ inch deep. A good rule of thumb is to plant a seed twice as deep as it is wide. This is deep enough to stay dark and moist but shallow enough for the sprout to push through. For an alternative way to boost success, try The Paper Towel Method: A Step-by-Step Guide to Germinating Pepper Seeds Fast.
- Water Gently: Lightly mist or water the surface to ensure good seed-to-soil contact.
- Add Heat & Humidity: Place the trays on your heat mat and cover them with a clear humidity dome (or plastic wrap). This creates a mini-greenhouse, locking in the warmth and moisture that pepper seeds crave.
-
Be Patient! This is the hardest part. Some varieties like Jalapeños might sprout in under a week. Stubborn superhots can take up to a month or even longer. As long as the soil is warm and not waterlogged, have faith! Wondering Why Aren't My Pepper Seeds Sprouting? Here are 5 Common Mistakes to Avoid. For the most stubborn seeds, you may need advanced techniques. Read our Guide to Seed Stratification & Scarification: Pro Tips for Stubborn Seeds.
- Let There Be Light: The moment you see the first green sprout emerge, remove the humidity dome and turn on your grow light. Position the light just a few inches above the seedlings and keep it on for 14-16 hours a day. This strong, direct light is what builds strong, stocky plants.
Caring for Seedlings & Transplanting
Your babies have sprouted! Now, the goal is to grow them into strong, sturdy plants ready for the great outdoors. This stage is all about providing the right amounts of light, water, and nutrients.
Seedling Care
Light: Keep your grow light 2-3 inches above the tops of your seedlings. As they grow, raise the light. This close proximity prevents them from stretching and becoming weak. If you see the leaves curling or looking bleached, the light might be too close, so back it off an inch. Learn How to Fix Leggy Pepper Seedlings (And How to Prevent Them).
Watering: Overwatering is the #1 killer of seedlings. Wait until the top of the soil is dry to the touch. Water from the bottom by placing your seed trays in a shallow pan of water for 15-20 minutes. The soil will soak up exactly what it needs through the drainage holes. This encourages deep root growth and prevents fungal issues on the surface. Master this skill with our guide on How to Water Pepper Seedlings for Strong, Healthy Growth.
Airflow: A small, gentle fan blowing over your seedlings works wonders. It strengthens their stems (mimicking a natural breeze) and helps prevent fungal diseases by keeping the soil surface dry.
Fertilizing: Your seedlings will get their initial energy from the seed itself. Once they develop their first or second set of "true leaves" (the ones that look like actual pepper leaves), it's time for their first meal. Begin feeding them once a week with a liquid fertilizer diluted to half-strength. Get the details in our guide to Fertilizing Pepper Seedlings: What, When, and How Much to Use.
Potting Up: As your seedlings grow, they need to be moved to larger containers. If they look crowded or stop growing, it's time to "pot up" into a larger container (like a 4-inch pot). This gives the roots more room to expand, leading to a much stronger plant. Follow our Potting Up Peppers: A Step-by-Step Guide for Healthier Roots. This is also the time to start thinking about their final home. See our advice on Choosing the Right Pot Size for Every Type of Pepper Plant.
Topping: Some growers prune the top of a young pepper plant to encourage bushier growth. Is it right for you? Read To Top or Not to Top: The Great Pepper Plant Debate.
Hardening Off & Transplanting
You can't just move your coddled indoor plants into the harsh outdoor world. You must "harden them off" first. This is the critical process of slowly acclimating them to direct sun, wind, and fluctuating temperatures to avoid shock. Don't skip this step! Follow The Foolproof Guide to Hardening Off Pepper Plants.
Start Slow: About 1-2 weeks before your last frost date, start the process. On day one, take your seedlings outside to a shady, protected spot for just one hour, then bring them back in.
Gradually Increase Exposure: Each day, increase their time outdoors by an hour and slowly introduce them to more direct morning sunlight. Avoid the intense afternoon sun at first.
The Final Days: By the end of the two weeks, your plants should be able to handle a full day of sun and are ready for their permanent home.
Planting Day: Once all danger of frost has passed, it's time to transplant! Learn When and How to Transplant Peppers into the Garden for Zero Shock.
- Choose the right spot: Pick the sunniest location in your garden. Peppers want at least 6-8 hours of direct sun.
- Prepare your soil: Make sure your garden bed is ready for its new residents. Read our guide on Preparing Your Garden Soil for a Bumper Pepper Crop.
- Give them space: Proper spacing is key. Find out How Far Apart Should You Plant Peppers for Maximum Airflow and Yield.
- Water them in: After transplanting, give them a deep watering. This is different from seedling care. Learn The Golden Rule of Watering Pepper Plants in Your Garden or on the Patio.
Managing Pests & Problems
Even the best-kept gardens face challenges. A little vigilance goes a long way in keeping your plants healthy. The best defense is a good offense. Learn our top 5 Weekly Habits to Keep Your Pepper Plants Pest-Free. Another great strategy is to use nature to your advantage. Discover the benefits of Companion Planting for Peppers: Using Nature to Deter Pests.
Common Pests:
Aphids: These are tiny, pear-shaped insects (often green, black, or yellow) that cluster on the undersides of new leaves and stems, sucking the life out of your plant.
- Solution: A strong blast of water from a hose can knock them off. For more stubborn infestations, a spray bottle of water with a few drops of dish soap (insecticidal soap) will do the trick. Ladybugs are natural predators, so attracting them to your garden is a great long-term strategy.
For a complete strategy, learn How to Get Rid of Aphids on Pepper Plants for Good (Organic Methods).
Spider Mites: These tiny arachnids are hard to see with the naked eye, but you'll notice their calling cards: fine webbing on the plant and tiny yellow or white speckles on the leaves. They thrive in hot, dry conditions.
- Solution: Spider mites hate moisture. Misting your plants with water can deter them. An application of neem oil is also highly effective at disrupting their life cycle.
Get the full scoop on Identifying and Controlling Spider Mites on Hot Pepper Plants.
Hornworms: Large, green caterpillars with a "horn" on their tail end. They have a voracious appetite and can strip a plant of its leaves overnight.
- Solution: The best defense is a good offense. Inspect your plants regularly (look for their black droppings, called frass). When you find one, simply pick it off by hand and drop it in a bucket of soapy water.
Common Problems (Physiological Issues):
Sometimes the issue isn't a bug, but a sign of stress or a deficiency. Discolored leaves are a common clue. Figure out Why Are My Pepper Plant Leaves Turning Yellow? (7 Common Causes).
Blossom End Rot: The bottom of your developing peppers turns dark brown, leathery, and mushy. This isn't a disease, but a calcium uptake problem, usually caused by inconsistent watering.
- Solution: Water your plants deeply and consistently—don't let them dry out completely between waterings. Applying a layer of mulch can help retain soil moisture. In a pinch, a foliar spray with calcium can provide a quick fix.
For a deep dive, read What is Blossom End Rot and How Do I Stop It?
Sunscald: White, papery, or sunken spots appear on the side of the pepper that gets the most intense sun. It's essentially a sunburn.
- Solution: Healthy, bushy plants with plenty of leaf cover are the best prevention. Avoid over-pruning. If a heatwave is in the forecast, you can provide temporary relief with a shade cloth during the hottest part of the day.
Learn how to Identify, Treat, and Prevent It with our guide to Sunscald on Peppers.
Flowers Dropping Off: It can be heartbreaking to see dozens of potential peppers fall to the ground. This is usually a sign of stress.
- Solution: The most common cause is temperature extremes (too hot, over 90°F, or too cold, below 60°F). It can also be caused by inconsistent watering or a lack of pollination. Ensure consistent moisture and be patient, the plant will likely set fruit when conditions improve.
It's a common frustration. Find out why in Help! My Pepper Plant Flowers Keep Falling Off (Bud Drop Explained).
Sometimes, diagnosing the problem can be tricky. Use our Guide to Common Pepper Plant Nutrient Deficiencies to help. It's also important to know if you're dealing with a simple issue or a more serious disease. Learn to spot Bacterial Leaf Spot vs. Fungal Diseases: How to Tell the Difference on Your Peppers.
Harvesting and Storing Your Peppers
 This is it, the moment you've been waiting for! All your hard work has paid off, and now it's time to reap the fiery rewards.
When to Harvest:
The best indicator is color. Most peppers will signal their ripeness by changing from green to their final, vibrant mature color (red, orange, yellow, chocolate, etc.). See our detailed Harvest Guide for 10 Popular Varieties to know exactly when to pick.
While you can eat many peppers when they're green (like Jalapeños), the full flavor profile and peak heat level will only develop once they reach full color. A red Jalapeño, for example, is sweeter and often hotter than a green one. The pepper should feel firm and crisp to the touch. Learn The Difference Between Green, Red, and "Corked" Jalapeños.
If frost is threatening, don't panic! Here's How to Ripen Green Peppers Off the Vine.
Scorch Squad Tip: Harvest pods regularly! The more you pick, the more the plant will produce. When a plant has ripe pods on it, it puts its energy into maturing those seeds. When you remove them, the plant switches its focus back to producing more flowers and more peppers for you!
How to Harvest:
Always use a pair of scissors or pruning snips to cut the peppers from the plant. Leave a small piece of the stem attached to the pepper, like a little green hat. Do not pull them by hand! This can easily damage or break the entire branch you're harvesting from, costing you future peppers. For superhots, it's a good idea to wear gloves even when harvesting, as the capsaicin oils can be present on the skin of the pod.
While you're harvesting, it's the perfect time to think about next season. Learn How to Harvest Pepper Seeds to Grow Next Year.
Storing Your Bounty:
You've got a bucket of beautiful peppers. Now what? You have plenty of options to keep the heat going for months. For a deep dive, explore 5 Ways to Preserve Your Pepper Harvest for Year-Round Heat.
- Fresh: For short-term storage, place your unwashed peppers in a plastic bag in the crisper drawer of your refrigerator. They will typically last for 1-2 weeks this way. Don't wash them until you're ready to use them, as moisture can speed up spoilage.
- Freezing (Easiest Method): This is the simplest way to preserve your peppers' flavor and heat for the long haul. Wash and thoroughly dry your peppers. You can freeze them whole, or slice/dice them first. For best results, "flash freeze" them: spread them in a single layer on a baking sheet and freeze for an hour. Then, transfer the frozen peppers to a freezer bag. This prevents them from clumping into a giant pepper-iceberg. Frozen peppers can lose their crunch but are perfect for sauces, soups, stews, and stir-fries. Make sure you know How to Freeze Peppers the Right Way (So They Don't Turn to Mush).
-
Drying (For Flakes and Powders): This is the classic method for thin-walled peppers like Cayennes, Tabascos, and other chiles. Check out The Ultimate Guide to Dehydrating Peppers and Making Chili Powder.
- Dehydrator: The most reliable method. Set it to a low temperature (around 135°F / 57°C) and let it run until the peppers are brittle and snap easily.
- Oven: Set your oven to its lowest temperature, spread the peppers on a baking sheet, and prop the oven door open slightly to allow moisture to escape.
- Air-Drying: You can string peppers together into a "ristra" and hang them in a warm, dry place with good airflow. This looks fantastic and works great in arid climates. Once completely dry, you can store them whole or blitz them in a coffee grinder (dedicated to spices!) to make your own chili powder and flakes.
-
Making Sauce & Pickling (Ultimate Flavor): This is where you can get truly creative. Take the leap From Garden to Bottle: A Beginner's Guide to Fermented Hot Sauce. Turn your harvest into a signature hot sauce through cooking or fermenting. Or, try something sweet and spicy. Our Step-by-Step Candied Jalapeño Recipe for Making Cowboy Candy is a must-try.
Have more peppers than you know what to do with? Discover some Creative Ways to Use a Bumper Crop of Peppers.
Congratulations, you've completed the journey from seed to harvest! There is nothing better than sharing your homegrown peppers with friends and family.
Now, we want to see what you're growing! Follow us on Instagram @thescorchsquad and tag us in your garden photos.
Happy growing, and stay spicy!